
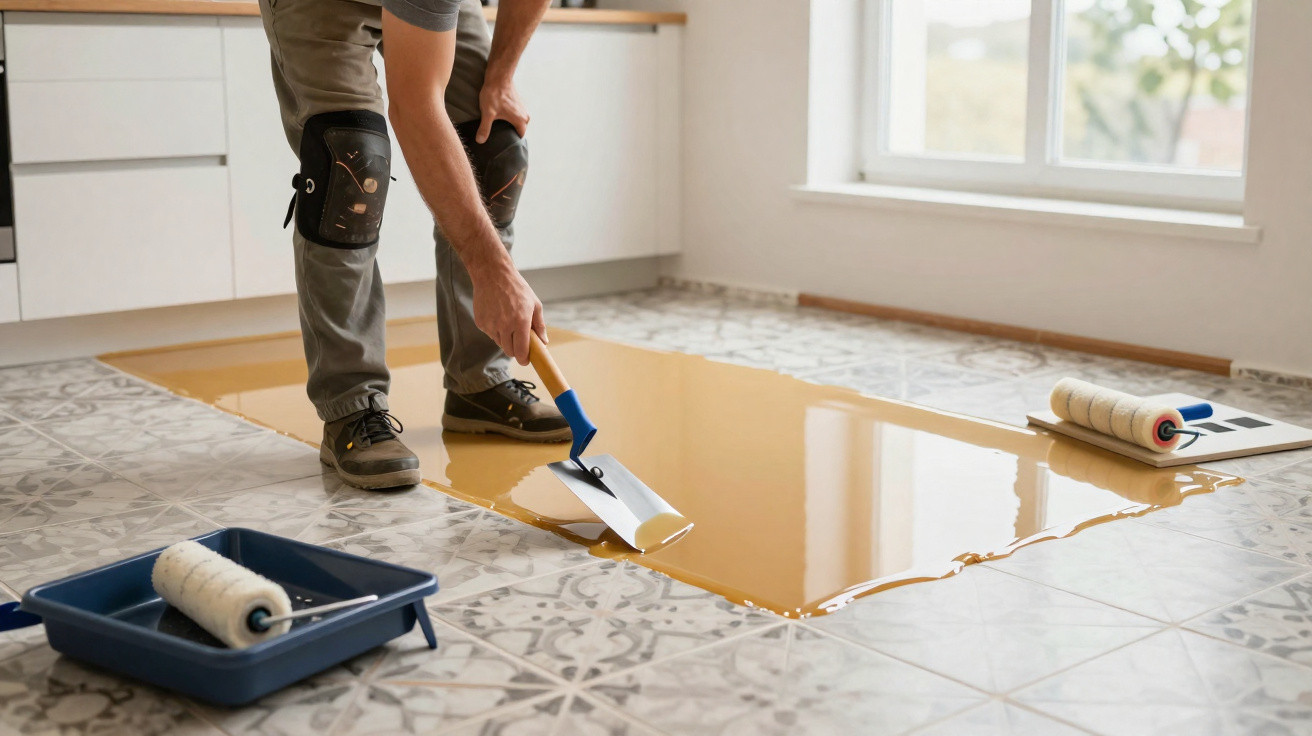
Many homeowners and tenants know the dilemma: the old tiled floor is technically sound, yet it looks completely dated. Even so, no one wants to contemplate a dusty major building project involving jackhammers, rubble and days of noise. This is precisely where a floor covering laid directly over old tiles comes in: without ripping them out, it can transform the look of a room entirely.
Why a new covering over old tiles makes such a difference
With a conventional renovation, the tiles must be removed, the rubble disposed of, the subfloor prepared again and only then can a new floor be fitted. That means noise, dust, bulky waste, appointments with tradespeople and a clearly noticeable hit to the budget. Particularly after buying a flat, when finances are often already stretched, many people look for a less stressful solution.
One alternative is to install the new floor straight over the existing tiles. This avoids chiselling out the old ceramic tiles and considerably shortens the renovation period. Rather than seeing lots of small tiles with visible grout lines, you are left with one continuous surface. It feels more contemporary and calmer, while cleaning is noticeably easier because dirt can no longer settle in the joints.
“A seamless floor can make rooms appear larger, more cohesive and more high-end – even when the old tiles are still underneath.”
A resin-based covering is particularly popular for this purpose. It is applied as a liquid layer over the existing tiled floor and cures into a hard-wearing, waterproof surface that works equally well in bathrooms, kitchens, hallways and living spaces.
Resin flooring instead of tiles: how the system works
Decorative resin flooring – often based on epoxy or polyurethane – is laid over the existing tiled floor like a liquid skin. It covers every grout line and individual tile until only a smooth surface remains visible. Colour options range from warm beige shades and concrete-effect finishes to bright white and bold colour accents.
The result is a style reminiscent of modern loft floors, designer bathrooms or minimalist living spaces. At the same time, the layer remains relatively thin. In many cases, doors do not need trimming, and thresholds change only minimally.
- Seamless, easy-care surface
- Suitable for wet rooms such as bathrooms and kitchens
- Wide choice of colours and sheen levels
- Renovation without removing tiles or creating piles of rubble
- Long service life when the subfloor is properly prepared
For the floor to last, however, the subfloor has to meet several requirements. The tiles must not sound hollow or move, and they should be securely bonded. Loose tiles will eventually transfer their movement upwards, resulting in cracks in the new covering. Grease, soap residue and old care products must also be removed thoroughly, otherwise the resin coating will not adhere properly.
Preparation: no smooth floor without careful work
The most important part of the job takes place before the first drop of resin touches the floor. Begin with thorough cleaning: vacuum, mop and degrease. The floor must then dry completely, often overnight. Next, inspect every tile: anything loose or hollow-sounding needs repairing or replacing.
The grout lines are dealt with in the next stage. Deep or crumbling joints are filled with a levelling compound so that the finished floor is genuinely even. If this work is rushed, the tile grid will later reappear as slight depressions – exactly what the renovation is intended to avoid.
Many manufacturers also recommend a specialist primer that bonds to smooth tiled surfaces. It ensures the resin flooring adheres securely rather than peeling away later. This layer is applied with a roller or brush and must be allowed to dry thoroughly once again.
“The quality of the new floor depends directly on how cleanly and patiently the preparation has been completed.”
Gloss, matt or slip-resistant: which finish is right?
Once the subfloor is ready, the design stage begins. Flat owners have a surprisingly broad range of options here. Three basic finishes are typical:
| Finish | Characteristics | Suitable rooms |
|---|---|---|
| Matt | Understated, modern, less reflective | Living room, bedroom, large open-plan spaces |
| Satin | Slight sheen, less prone to showing marks | Hallway, kitchen, home office |
| Glossy | Strong reflection, very elegant, shows dust more quickly | Show kitchens, formal areas |
For a shower, bathroom or the area by the front door, a slip-resistant additive is advisable. This keeps the surface safe to walk on even when wet. In living areas, a smoother finish that is pleasant to clean is generally preferred.
DIY or hire a professional: what really makes sense
Anyone with practical skills who wants to renovate a small, straightforward area can use a complete kit. Many DIY shops and manufacturers offer sets in which the primer, resin and sealant are matched to one another. Prices for these solutions generally start at around €18 per square metre, depending on the product and its quality.
For larger areas, awkwardly shaped bathrooms or particularly high visual expectations, a specialist contractor is worthwhile. Professionals understand the usual sources of error, apply the covering at the correct thickness and prevent roller or trowel marks. The cost of this work can quickly fall between €100 and €150 per square metre, depending on the area, materials and chosen finish.
“Anyone seeking a designer-level finish in the living room will usually be safer with a specialist contractor than with a quick weekend project.”
Advantages, limitations and potential pitfalls
Resin flooring over old tiles solves many problems, but not every one. Room height is an important consideration: every additional layer raises the floor level slightly. This is barely noticeable in most flats, but where ceilings are very low or door clearances are tight, the build-up should be calculated beforehand.
There is another point to consider: the covering is hard-wearing, but not indestructible. Heavy impacts, sharp edges or furniture without felt pads can leave marks. In practice, a little care helps: pad chair legs, do not drag a washing machine across the floor when moving house, and avoid abrasive items.
Care, everyday practicality and how long the floor lasts
The main benefit of the seamless surface becomes clear in day-to-day use: cleaning is quicker, and there are no grey grout lines that refuse to become light again however much they are scrubbed. A neutral cleaner is generally enough for maintenance; strongly abrasive products should stay in the cupboard so the surface is not subjected to unnecessary wear.
With good preparation and proper use, the floor will remain attractive for many years. In some systems, minor scratches or dull patches can be refreshed later by applying a new topcoat. Choosing suitable furniture glides from the outset and adapting the cleaning routine can extend this period significantly.
For anyone living with a dated tiled floor but lacking the time or patience for a major renovation, the liquid covering is a serious option. It modernises the appearance, reduces the stress of building work and brings a seamless look to rooms that were previously dominated by small-format beige tiles.
If you are unsure, start by viewing sample areas or testing the system in an inconspicuous adjoining room. This gives a better feel for the texture, sheen and colour before the bathroom, kitchen or living room is transformed completely.

Comments
No comments yet. Be the first to comment!
Leave a Comment