
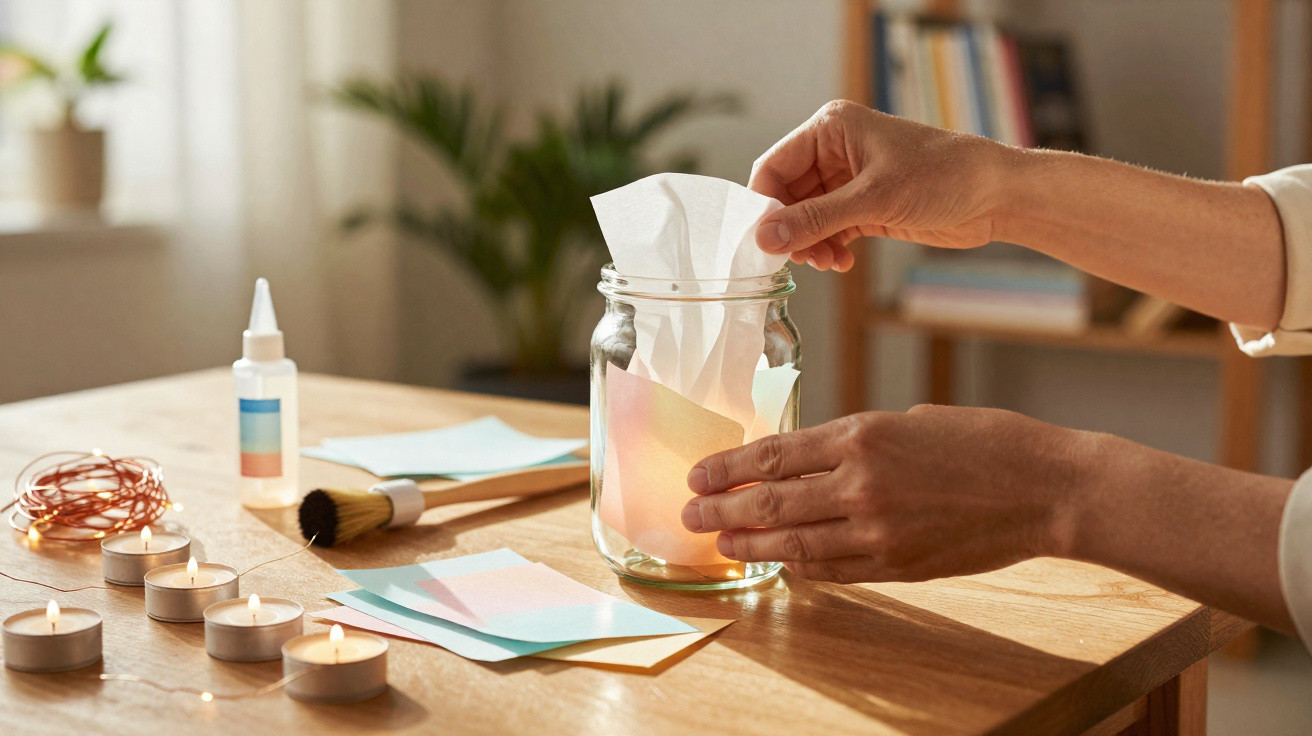
Glass jars that build up in the cupboard after their jam, sauce or preserve has been used are rarely given a creative purpose before being sent for recycling. Yet with tissue paper, PVA glue and a battery-powered LED light, any clean jar can become a decorative lantern with soft, personalised lighting. It looks lovely on tables, shelves and quiet corners of the living room, and costs next to nothing to make.
Why a glass jar is ideal for this project
The visual appeal of lanterns made from glass jars comes from a simple quality: as light passes through glass covered with translucent paper or decorative cut-outs, it casts light around the container. This produces a warm, diffused glow that no plastic lamp can recreate. The more irregular the paper pattern, the more striking the play of light and shadow on nearby walls and surfaces will be.
Preserve, jam and sauce jars are particularly suitable because they have smooth sides, an opening wide enough to hold an LED candle, and glass thick enough not to crack from the residual warmth of battery-powered lights. You do not need to cut glass, use specialist tools or have any crafting experience to achieve an attractive, finished result.
- Clean, dry glass jars: choose ones without cracks, chipped edges or rusty lids; smooth-sided jars are preferable so the decoration adheres properly.
- Tissue paper, patterned napkins or translucent paper: these materials allow light through and create the distinctive diffused effect of handmade lanterns.
- PVA glue diluted with water and a soft brush: the mixture should be fluid without becoming runny, ensuring the paper sticks smoothly to the glass without visible bubbles or creases.
- A battery-powered LED candle or string of tiny lights: this is the safest choice for indoor use, with no real flame, smoke or risk of overheating.
- Jute twine, ribbon or cord for finishing: wrapped around the rim of the jar and tied in a decorative knot, it gives the piece handmade charm without requiring extra glue.
How to remove a label without leaving glue residue on the glass
The first step-and one of the most important for the finished look-is to remove the label completely along with every trace of adhesive. Soak the jar in warm, soapy water for a few minutes. The moisture softens the label paper, making it easier to lift off without vigorous scraping. Start at one corner and pull gently; the label should come away in strips without leaving pieces behind.
If transparent glue remains stuck to the glass, put a few drops of vegetable oil or alcohol on a cloth and rub gently until it dissolves. Wash the jar again with washing-up liquid afterwards to remove the oil, then dry it fully before decorating. Any greasy residue will prevent the PVA glue from adhering properly to the glass, undermining the entire paper application.
Step-by-step guide to decorating and assembling the lantern
Once the jar is clean and dry, cut the tissue paper into strips, squares or irregular shapes. Unshaped pieces create a particularly attractive mosaic effect once the light is switched on inside: every overlapping layer produces a different shade, making the result far more interesting than covering the jar with one single sheet. Dilute the PVA glue with a small amount of water until it is fluid but not runny.
Complete lantern assembly sequence
Seven stages from the start to the final finish
Brush diluted glue over one section of the jar, then position the paper pieces on top. Gently brush over the attached paper to remove bubbles and creases, always working from the outer edges towards the centre. Continue around the jar in sections, leaving small areas of the glass uncovered. These paper-free points create brighter pools of light when the lantern is lit. Leave it to dry completely upright, without touching the paper while the glue remains wet.
Once dry-which takes from 30 minutes to an hour, depending on the room temperature-wind jute twine or ribbon around the rim and tie a decorative knot. Do not use this twine to hang the jar unless you have a dedicated support designed to carry the weight of the glass. Place the LED candle or small string lights inside the jar, then switch them on to see the finished effect. The candle or light-string switch should remain accessible through the jar opening, allowing you to operate it without removing the decoration.
Extra details, such as dried flowers, paper stars, leaf cut-outs or geometric shapes, can be glued over the first paper layer to add texture and dimension. The key is not to cover the entire jar: the exposed glass areas make all the difference, as they allow the sharper points of light through that create the lantern effect.
Style variations for different rooms and occasions
The same basic project can suit entirely different styles simply by changing the paper and colour palette. Tissue paper in earthy shades, muted green and caramel paired with jute twine creates a rustic boho look, ideal for living rooms with natural décor. Blue and white paper finished with satin ribbon is well suited to more classic spaces or party decorations. Patterned paper napkins with floral designs, applied directly to the glass, produce lanterns with an almost professional finish that work well as table decorations for special dinners.
For June festivals, yellow, red and green paper with sisal string turns the jar into an illuminated table decoration inspired by traditional bunting, replacing paper balloons without any fire risk because the light is LED. At Christmas, red and gold paper with cut-out little stars creates a festive version that can be included in table centrepieces alongside pine cones, eucalyptus sprigs and other natural elements.
Why LED lighting should always be used instead of a real candle
A battery-powered LED candle is the right option for both practical and safety reasons. Tissue paper glued to glass is flammable, and even a small real candle can produce enough heat to dry out the paper over time, increasing the risk of ignition if it is accidentally knocked over. LED candles convincingly mimic the flickering of a real flame and produce no heat or smoke, nor do they consume oxygen in the room. For arrangements featuring several jars together on a table, LEDs are also much more convenient, as the display can be left on for hours without concern.
This is the sort of project that starts with a jam jar and ends as a decorative piece that visitors will want to know where you bought. Share it with anyone who enjoys creative crafts and has unwanted glass jars piling up in the kitchen.

Comments
No comments yet. Be the first to comment!
Leave a Comment