
Opening an envelope or checking an app, you see the total and suddenly experience the chill in your draughty hallway rather differently. That freezing current beneath the front door is no longer merely “a bit annoying”; it feels like cash escaping from the house.
In an older property, these small betrayals begin to stand out everywhere. There is the shiver as you pass the bay window, the curtain that moves on its own during a windy evening, and the room that stays five degrees colder than every other room however much you turn up the thermostat.
It can seem unfair, even oddly personal. You value the building’s character: its lofty ceilings, timber doors and sash windows. Yet that charm comes at a cost in kilowatts and exasperation.
Then a modest trick reveals just how much heated air is getting away.
Why older homes lose money through hidden gaps
If you occupy an older house, you may already know precisely where the cold “lives”. It might be the living-room corner beside the window, the section of floor by the rear door, or the upstairs landing where wind gets in whenever a storm arrives.
What people often fail to appreciate is the combined effect of all those small draughts. A narrow gap beneath one door appears insignificant. Across an entire property, though, the gaps can amount to an open window left on tilt, steadily drawing out your heating throughout the day.
Picture the house as a balloon with a few leaks. Your boiler or heat pump keeps adding warm air, but heat will seep away if the gaps around doors and windows remain untreated. The heating system has to work harder, comfort disappears and bills gradually rise.
A basic roll of foam tape starts to seem rather more appealing.
UK energy assessors often recount a similar case: a couple in a 1930s semi who said their home “never feels warm”. They had upgraded the boiler, bled the radiators and even bought heavier curtains, yet none of it solved the problem.
When an assessor arrived with a thermal-imaging camera, the result was stark. Blue lines glowed around each window frame, the front door was surrounded by a vivid cold halo, and heat escaped through the floorboards beside the rear door like water running from a split pipe.
They paid under £80 for seals, brushes and several tubes of flexible sealant. The work took one quiet, slightly tedious DIY weekend. Their next bill was not halved, but it fell by enough for them to notice. Better still, they no longer needed jumpers while watching telly.
The same pattern plays out in countless older properties. It is neither glamorous nor Instagrammable, but it means fewer draughts, reduced bills and a home whose age suddenly feels like an advantage.
The principle is straightforward. Heating a house is a balance between the heat you generate and the heat you lose. Older homes commonly have single glazing or early double glazing, frames that have warped slightly, brickwork that has shifted and timber that has moved over many decades.
Those appealing imperfections form tiny gaps: around hinges, beneath sills and between a door and its frame. Air is both lazy and opportunistic, always travelling from warmth towards cold. Every crack gives it an easy route.
Sealing these openings does more than prevent “cold air coming in”. It slows the paths by which warm air leaves. As a result, a boiler or heat pump needs shorter bursts to achieve the same temperature, and you can feel comfortable with the thermostat set a little lower. The saving is not magic: it is physics, with foam and common sense applied.
How to find and seal draughts in older homes
The most valuable action is one that almost everyone overlooks: take an unhurried tour of the house on a windy day and simply pay attention. You need no equipment or gadgets, only your senses. Pause beside every window and door, close your eyes, and check for moving air against your hands, ankles and face.
Next, be more methodical. Hold a lit incense stick or a slim piece of tissue close to frame edges and thresholds. A flicker in the smoke or paper identifies a leak, so mark each location with masking tape.
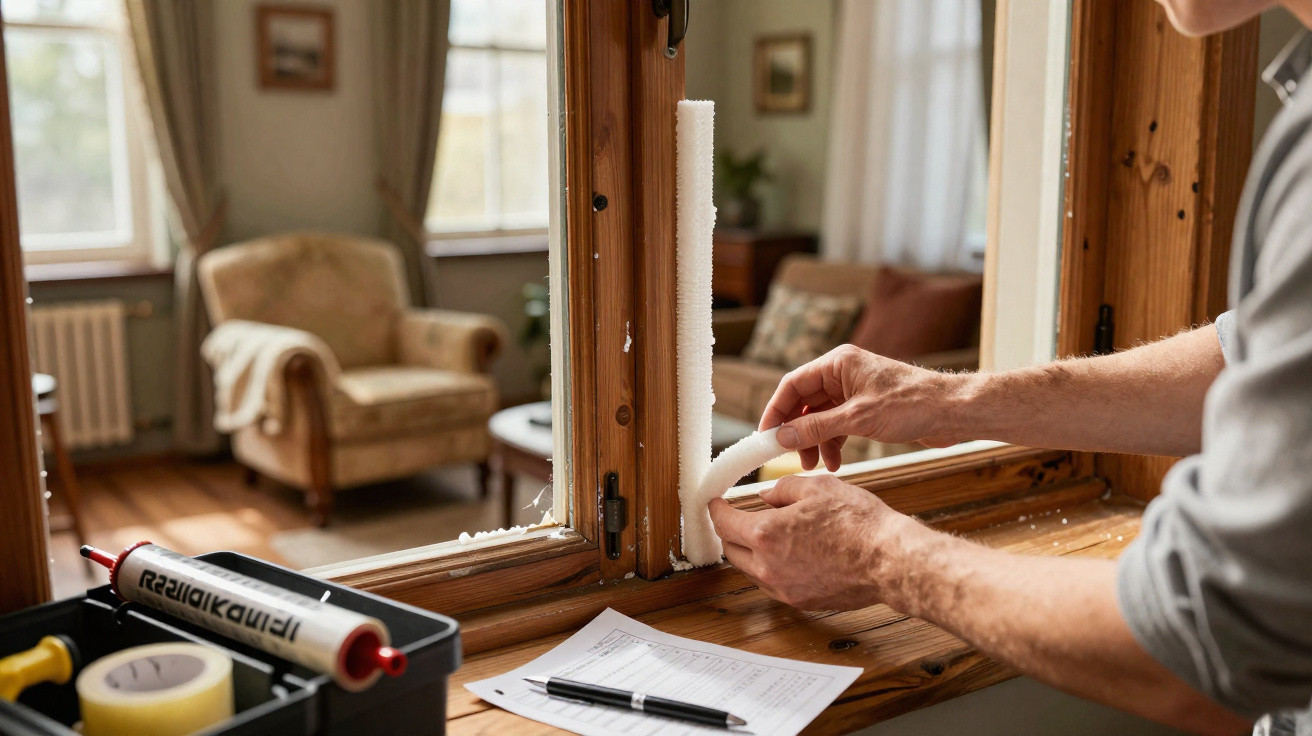
Return later with suitable supplies: self-adhesive foam or rubber strips for door and window frames; a brush strip or rubber threshold seal for door bottoms; and flexible sealant for openings around sills and frames. It may feel fiddly initially, but by the second window you can feel surprisingly capable.
There is a risk with this type of job: sealing too much, or sealing the wrong areas. Some older houses need a degree of background ventilation to manage condensation and damp. If every gap is blocked without consideration, a cold draught could be replaced by mould behind the wardrobe.
Work with the property rather than against it. Leave trickle vents open where your windows have them, and do not permanently close air bricks or vents used by gas appliances. Direct your effort towards clear comfort problems: noisy keyholes, gaps around loose letterboxes and that striking strip of daylight beneath the rear door.
It is also perfectly reasonable to tackle the job gradually. Draught-proof one room, live with the result for a week and judge the difference. Your body is a decent scientist when you give it time to notice changes.
Professionals use the phrase “building tight, ventilating right”, and it suits characterful older homes particularly well. The aim is to decide where air enters and exits, rather than leaving that choice to the wind.
“The cheapest unit of energy is the one you never have to use,” says Mark, a domestic energy assessor from Leeds. “People think payback means years. A £15 door brush can feel worth it in a single stormy night.”
A sensible way to stay practical is to prioritise quick improvements before longer projects. Begin with:
- Self-adhesive foam or rubber seals on the leakiest doors and windows
- A good brush or rubber seal fitted to the front and back doors
- A straightforward letterbox cover and a close-fitting keyhole cover
Let’s be honest: nobody genuinely does this every day. You will not make draught-hunting a weekly routine. Still, one realistic weekend with tape, a door brush and a tube of sealant can change the feel of the whole winter.
A warmer, cheaper and less draughty old home
The greatest surprise is usually not the bill but the sensation. Once the worst gaps are closed, the house often seems quieter. That faint, persistent chill at the back of your neck while reading or working from home disappears.
The change is particularly noticeable when you come in on a cold, rainy evening. Previously, the hallway may have felt like an in-between space separating the street from the living room. Now, warmth reaches you sooner, and you stop instinctively putting on a second pair of socks.
At a more fundamental level, draught-proofing alters your relationship with the building. Older homes can seem like determined characters that insist on doing things their own way. When you identify their leaks and carefully repair the weak points, it begins to feel as though you are working with the house instead of battling it.
We have all looked at a winter energy bill and felt a little helpless. Sealing gaps may lack glamour, but it is one of the few actions with a direct and tangible effect. You will remember the inch of foam around the frame and the brush strip fixed to the threshold when the wind is roaring but the curtains remain still.
Nor does the result need to be flawless. A slightly uneven strip of tape still stops a draught, and a door brush with one loose screw still reduces the wind. The goal is not to turn an old property into a laboratory-standard airtight box. It is to waste less heat, be more comfortable and make the space suit the life you really lead in it.
| Key point | Detail | Benefit for the reader |
|---|---|---|
| Identifying air leaks | Use your hands, smoke or tissue to locate draughts around doors and windows | Makes it possible to target the areas that genuinely waste energy |
| Selecting the right materials | Foam or rubber strips, door brushes and flexible seals suited to each kind of leak | Prevents unnecessary purchases and maximises the effect on the bill |
| Ventilating intelligently | Reduce troublesome leaks while retaining the air inlets needed for a healthy home | Keeps the home healthy while limiting heat loss |
Frequently asked questions about draught-proofing
- How much can I really save by sealing draughts? In a typical older UK home, targeted draught-proofing can reduce heating use by roughly 5–15%, depending on how leaky the property is at the outset.
- What should I seal and what should I leave alone? Seal gaps around windows, external doors, loft hatches and skirting boards; keep trickle vents, air bricks and anything serving fires, stoves or gas appliances open.
- Is this worth it if I rent my home? Removable, low-impact options such as self-adhesive strips, draught-excluder sausages and clip-on letterbox covers can have a substantial effect without upsetting your landlord.
- Can I do this myself or do I need a professional? Most standard draught-proofing tasks are straightforward DIY; if ventilation concerns you or the older building is complex, a home energy survey can provide direction.
- Won’t sealing everything cause damp or mould? It can if the work is poorly planned, which is why designed ventilation points should stay open and attention should go to obvious leaks that make rooms uncomfortable.





Comments
No comments yet. Be the first to comment!
Leave a Comment