
A seemingly trivial nuisance can quickly turn a peaceful evening at home into a minor household emergency. Faced with a blocked sink, many people reach for the strongest drain cleaner available, hoping it will work without understanding what is clogging the pipework.
Why harsh drain cleaners rarely provide a lasting fix
In both the UK and the US, bathroom sink blockages tend to develop in much the same way. The water begins to drain slowly, a quiet gurgling sound follows, and then a stale odour starts to emerge. Once the basin resembles a shallow pool, many households have already emptied at least one bottle of chemical unblocker into the waste.
Professional plumbers rarely reach for a bottle first. Their favourite fix is almost always 100% mechanical.
The early warning signs in your sink
A slow-running sink does not normally become blocked without warning. At first, the water takes slightly longer to clear after you wash your face. Soon afterwards, you may hear a hollow glug-glug as air struggles to move through the pipe. In many properties, the next symptoms include:
- unpleasant smells that remain even after the bathroom has been cleaned
- water collecting around the plughole after each use
- a light brown or grey mark appearing where the water repeatedly stops
Over time, hair, soap residue and skin oils combine into a dense obstruction. The warmth inside the home encourages bacteria to multiply within this material, which is why the smell can resemble rotten eggs or a damp changing room.
What chemical unblockers can do to pipework
Many widely sold drain cleaners contain powerful acids or alkalis. These substances react with organic debris and generate heat. When the build-up is recent and soft, they may sometimes create a narrow route through the blockage. As the sink starts draining again, the cleaner appears to be “effective”.
Plumbers often find a different result. The obstruction is rarely removed completely. Instead, some of it dissolves into a tacky paste that sticks farther along the pipe. Hair and soap from the following weeks then catch on this uneven surface, and the blockage comes back, often more severely.
Repeated chemical treatments can slowly thin plastic pipes, dry out rubber seals and damage metal finishes around the plug.
In older properties with vulnerable plumbing, this quick solution may even cause leaks. When the environmental consequences of sending caustic chemicals into the wastewater system are considered too, the professional preference for hands-on cleaning becomes easier to understand.
The “secret” method plumbers use first for a blocked bathroom sink
Although concealed behind tiles and chrome fittings, a bathroom sink is a straightforward arrangement: a basin, a waste outlet, a curved trap and a discharge pipe. The most important part is positioned beneath the basin, usually out of sight behind cupboard doors.
The modest trap and its important job
Under most basins, there is a U-shaped, S-shaped or bottle-shaped section of pipe. This is the trap. It retains a small amount of water, preventing sewer gases from travelling back into the bathroom. Its shape also means that it naturally collects debris.
| Trap function | What actually happens |
|---|---|
| Block odours | A permanent water seal prevents air from the drainage system entering the bathroom. |
| Catch objects | Rings, hair grips and other small belongings commonly end up here rather than disappearing permanently. |
| Trap build-up | Hair, toothpaste, soap and limescale gather in the bend, gradually creating a blockage. |
For a plumber dealing with a sluggish bathroom sink, this is generally the first component they inspect. They do not begin with a drain snake, a chemical bottle or a camera. They start with the trap.
Why manual cleaning is better than a chemical “attack”
Taking off the trap and washing it manually achieves something chemical products seldom can: it returns the pipe to its original internal width. Water can then pass through as freely as it did when the sink was first fitted.
Instead of burning through the clog, you physically remove it and leave almost nothing behind for new debris to stick to.
There is no additional heat putting strain on plastic fittings. There are no vapours to irritate the eyes or lungs in a compact, steamy bathroom. You can also see precisely where any misplaced jewellery has gone.
The no-splash plumbing method many plumbers rely on
Fear of making a mess puts many people off attempting even simple plumbing tasks. However, a basic process removes much of that concern. It closely follows the routine experienced tradespeople use for minor domestic call-outs.
The bucket step that protects the floor
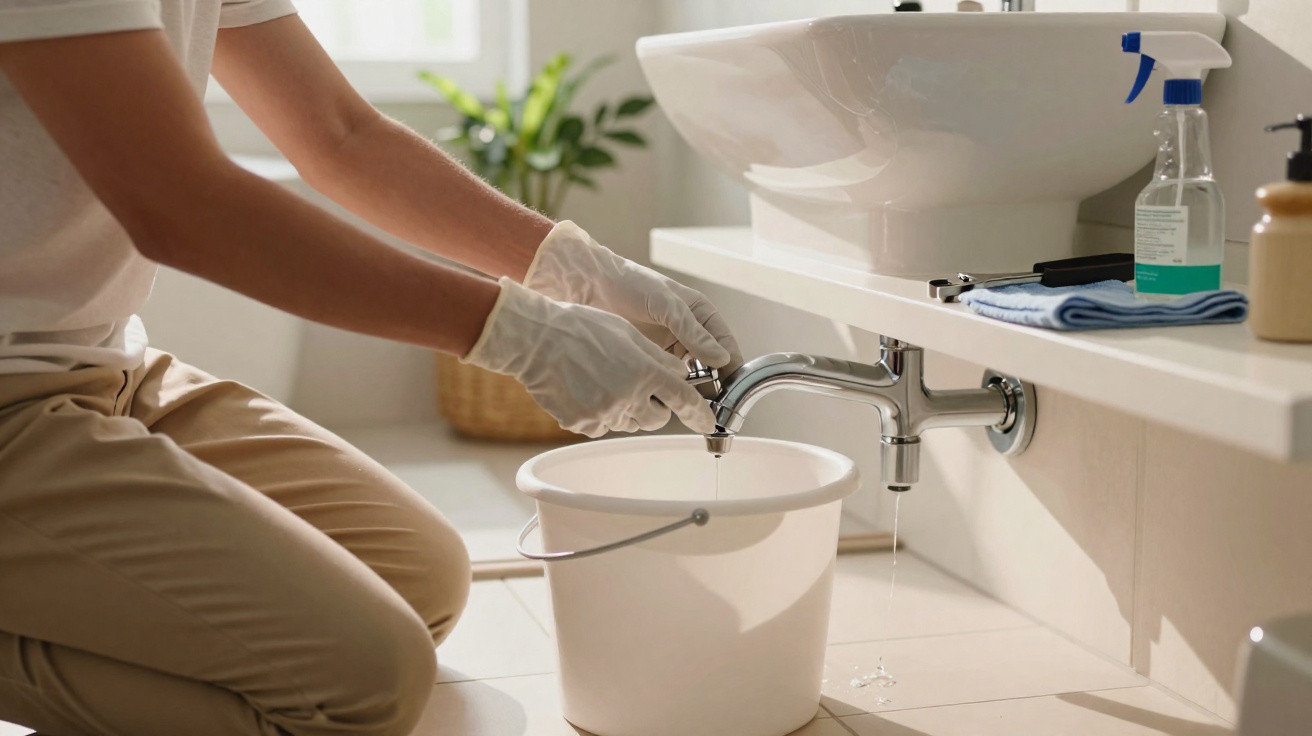
Before loosening a single fitting, empty the cupboard beneath the basin. Put a shallow bucket, washing-up bowl or storage tub directly under the trap, and keep an old towel close by to catch any stray drips. This provides a simple safety net.
Most newer traps can be unscrewed without tools. The lower bend or bottom cup will usually come away with a firm twist by hand. If it is difficult to grip, use a cloth or rubber glove for extra hold. Adjustable pliers may help with a gentle squeeze, although plumbers usually wrap the jaws in a rag first so they do not scratch plastic or chrome.
As the threaded section comes loose, the water held in the trap falls into the container rather than onto the bathroom floor. That one small precaution prevents the task from becoming chaotic.
The unpleasant but highly effective clean-out
After the bottom section of the trap has been removed, the source of the issue is usually immediately visible: a dark, matted mass that smells even worse than it appears. At this stage, plumbers generally carry out three tasks:
- remove hair and debris manually or with a small hook
- clean the inside of the trap using an old toothbrush or bottle brush
- rinse all parts with very hot tap water or boiled kettle water left to cool for a minute
The goal is not just to dislodge the main plug, but to remove the slimy film that lines the pipe walls.
Known as biofilm, this coating works like glue for fresh debris. Removing it makes another rapid blockage less likely. Some professionals will also feed a small flexible brush or a short piece of cable a little way into the waste pipe, clearing any early build-up beyond the trap.
Reassembly: where leaks either begin or are avoided
Before refitting the components, inspect the rubber seals carefully. These O-rings and conical washers create the watertight joins between trap sections. If they appear split, compressed or sticky, replacements are inexpensive and can often prevent later drips.
When putting the trap back together, plumbers stick to two straightforward principles: engage the threads accurately and tighten them by hand. Damaging lightweight plastic fittings by cross-threading can create hidden faults that leak later. Once the trap is secure, run the tap and place a hand around every joint to check for even the smallest bead of water.
From a swampy basin to a healthier bathroom routine
People who use this approach once often view minor plumbing problems differently afterwards. A task that initially appears “technical” can prove very manageable, with an immediate visible result.
A sink that drains freely and smells neutral again
Once the trap has been cleaned, water resumes its natural swirl through the plughole. Rather than sitting in the basin, it drains away in a steady, reliable flow. The lingering odour disappears not because it has been covered up, but because the bacterial source has been removed along with the sludge.
That ten-minute intervention often improves both hygiene and comfort more than another round of scented cleaning sprays.
For households with children or pets, avoiding corrosive products also removes another chemical risk from the cupboard under the sink. This is particularly relevant in small bathrooms where storage is easily accessible to little hands.
Straightforward habits that stop the job becoming monthly
Plumbers who do not regularly return to the same sink usually recommend two simple routines instead of miracle products:
- fitting a drain strainer over the plughole to catch hair and larger debris
- flushing the drain with hot water each week to soften early soap deposits before they set hard
In hard-water areas, limescale creates an additional issue by making the inner pipe surface rougher. Using a strainer and rinsing regularly with hot water reduces the amount of scale that can adhere to organic matter. Together, these measures slow the entire blockage process.
When DIY cleaning will work, and when to call a professional
This straightforward mechanical method is suitable for most ordinary bathroom sinks where the trap is easy to reach. It is especially effective in modern houses and flats with relatively short runs of pipework.
However, a blockage may sometimes be located farther along the drainage line, or the pipes may pass through confined areas that cannot be accessed easily. Slow drainage affecting several fittings at once, a toilet gurgling as the basin empties, or water rising in the bath may indicate a more substantial obstruction or a ventilation issue. In such cases, professionals can use inspection cameras and longer drain snakes, and they may understand the unusual layouts concealed behind walls in older properties.
For many common blockages, though, this uncomplicated “bucket, twist, clean, reassemble” method closely matches the work a plumber would carry out for a call-out charge. Knowing how it works can turn a frustrating winter blockage into a controlled small task, leaving the bathroom cleaner, safer and more comfortable to use.




Comments
No comments yet. Be the first to comment!
Leave a Comment